Entering Bank Transactions Using a File Import
What are File imports?
If you are not using automatic bank feeds as a Pro user, you can use file imports instead. This saves time typing out manual information such as the date, description and amount. File imports also greatly reduce the risk of human error compared with entering transactions manually.
What banks/institutions do Quant support?
Quant has default formats for the main banks including; Barclays, Natwest, HSBC, Royal Bank of Scotland, Lloyds and Santander. If you use a different bank or institution, then you can create a custom file import format which you can use each time you import transactions.
How do I use file imports if I use a default bank?
To enter new transactions using our File Import method you will first need to download your bank transactions (your statements) from your bank account (usually in CSV or OFX format) and import this data into Quant.
Then click the ‘Enter Transactions’ button for bank account you wish to enter transactions for.

Alternatively, you can also enter new bank transactions using the File Import method by clicking the Quick Links menu and then selecting the account you wish to enter transactions for.
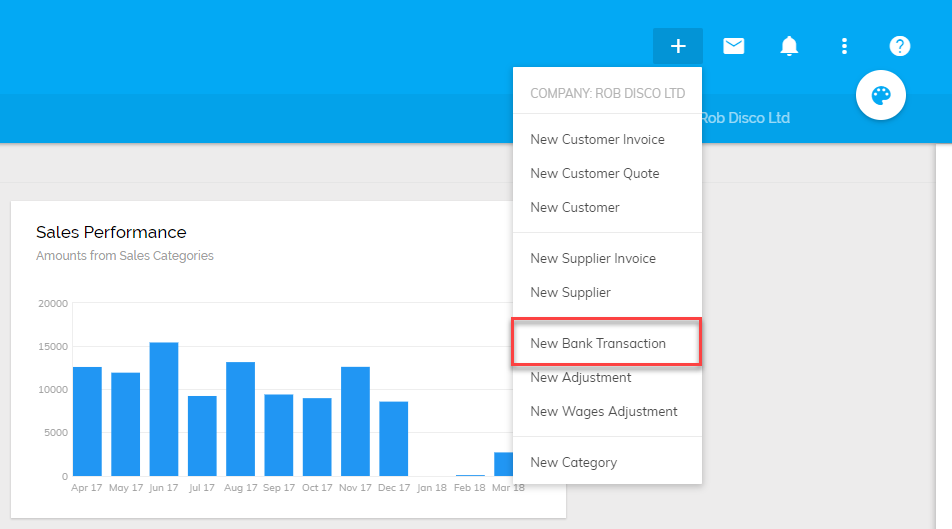
Then click the ‘File Import’ button (shown below)

After this, you will be asked to enter a few details and to upload your file (downloaded from your online banking). Please enter a description (it’s a good idea to specify the period the file is for here), default bank, the bank it relates to in Quant and attach the file by searching or dragging and dropping it on screen.
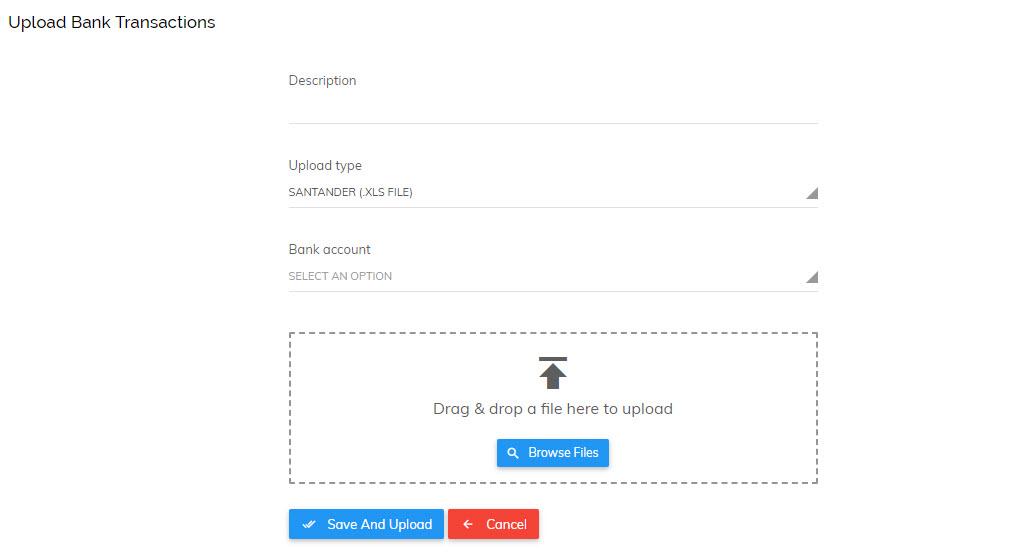
Once this is complete you will be able to check and confirm the transactions you have imported.
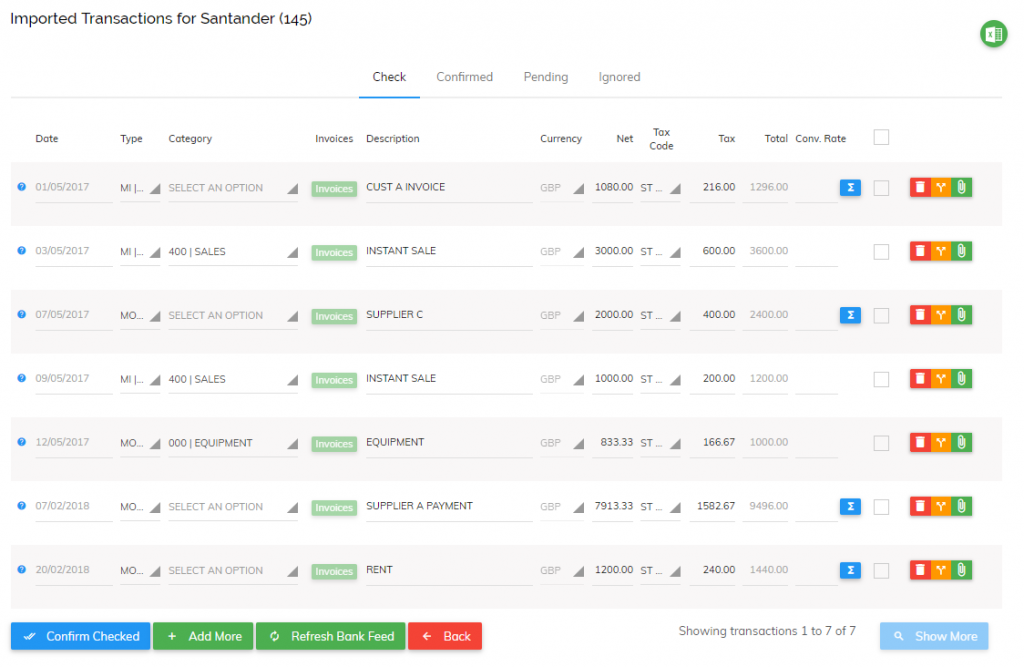
Transaction Types
There are four types of transactions:
- Money In: This type of transaction is for amounts received into your bank account. This could be loans received, refunds, sales you have made (that are not from customers you offer credit terms to).
- Money Out: Any amounts going out of your bank account apart from payments made to suppliers that have offered you credit.
- Customer Receipt: This is for amounts received from customers that you have issued an invoice to.
- Supplier Payment: This is for amounts paid to suppliers that have issued an invoice to you.
You may need to change the type of transaction from Money In to Customer Receipt or Money Out to Supplier Payment, depending on the type of transaction you are processing.
*Please note if a customer has overpaid you, i.e. paid more than the amount you invoiced them, you can allocate this to their account using our Overpayments feature.
Using the example invoice below:
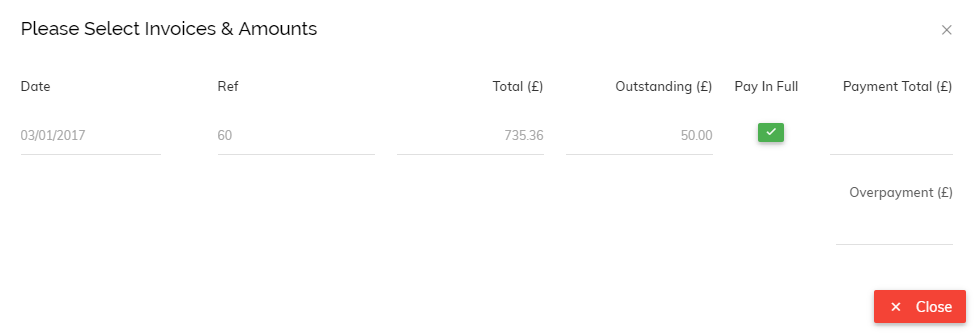
If the customer had accidentally paid you £60 you would enter 50.00 in the Payment Total field and 10.00 in the Overpayment field, like so:
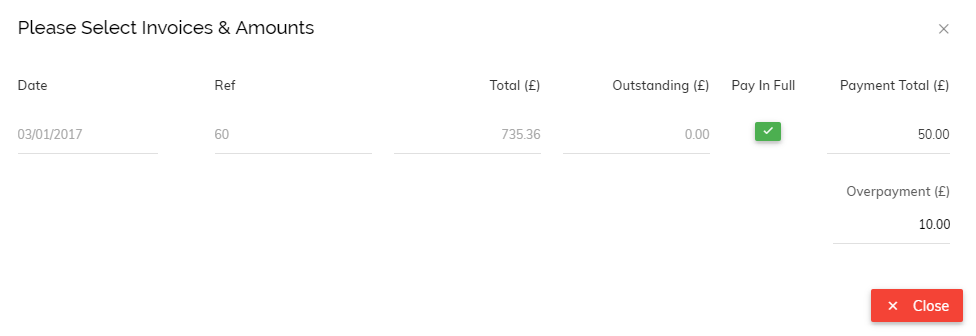
This over payment would then be saved on their account for the next time an invoice is sent out where it will be automatically deducted from their next invoice.
The Overpayments feature works in exactly the same way if you have overpaid one of your suppliers. First select Supplier Payment as your transaction type, choose your supplier and select the invoice you have overpaid. Then enter the Payment Total followed by the Overpayment total.
The amount you have overpaid will then stay on the account and automatically offset against the next invoice you are issued from your supplier.
Categories and Tax Codes
After selecting the correct transaction type, simply select the relevant categories and tax codes (if applicable) then click the checkbox once you’re happy with each transaction.
Here is a brief explanation of how to select the correct Category and Tax Codes (if applicable):
Category: If the transaction is a customer receipt or supplier payment, this option allows you to select the customer/supplier it relates to. You will then be able to select the invoice the amount relates to. Once the invoice is selected, you can move on to the next transaction. You do not need to separate the VAT amount for customer receipts and supplier payments as this has already been done at the invoice level.
If the transaction is just money in or money out of your account, you can select the appropriate category for the transaction. For example, all money spent on delivering an item to a customer would go under ‘Postage’.
Tax code: If the transaction is money in or out and your business is VAT registered then the relevant tax code should be selected.
For more information on how to create a custom file import please click here.
